
Selection Before & After Project


Photo Editing Software Class: Exploring Selection Tools
This project was completed in two parts. The objective was to experiment using four different methods of selection in order to remove the background and isolate the subject in four separate stock images of varying styles.
In part two, inverse selection and the paint bucket tool were implemented in order to create silhouettes. In both parts, layer group and layer visibility management were practiced.
All images used were acquired by the instructor.

Before images provided by instructor
Behind the Scenes - Part 1
Step 1: We were given the choice between two background images, and after one was chosen, the image was locked.
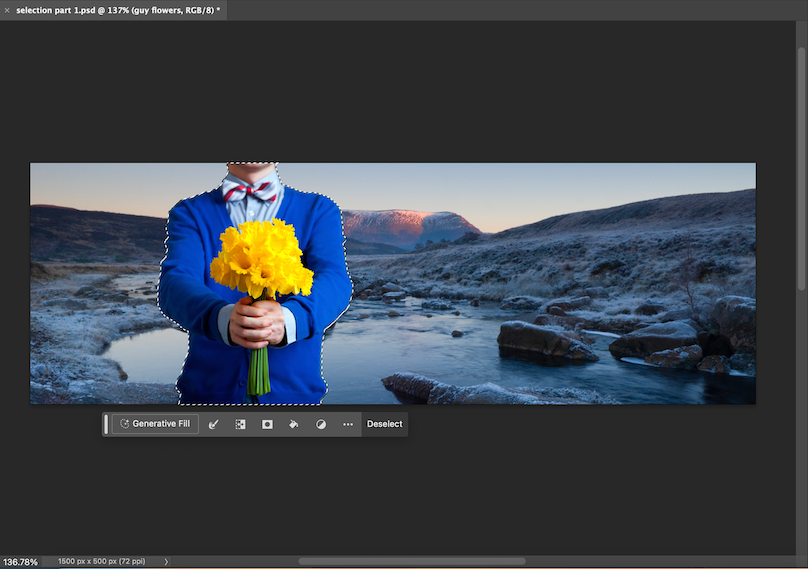
Step 2: For the "man holding flowers" image, the Object Selection tool was chosen and a marquee drawn over the image. The selection was inverted and the background deleted, leaving just the subject.
Step 3: For the photographer image, the Magic Wand tool was used to select all the white background and deleted.
Step 4: The Quick Selection tool was used on the "beach girl" image. The brush size was adjusted as needed and applied to all the pixels on the girl: her body, shirt, and hair. After she was completely brushed over, inverse selection was used to delete the background.

Step 5: The Pen tool was used to draw a path around the smaller of the two dogs. After the path was drawn, the Paths panel was used to make a selection, which selected the dog. In order to remove the background, inverse selection was implemented.
Step 6: After all the subjects from the images were isolated, they were arranged appropriately on the creek background, and the file was saved.

Behind the Scenes - Part 2
Step 1: Using the PSD version of the file from Part 1, one of the images was duplicated, leaving a total of 5 images to work with.
Step 2: The main background image was turned off and replaced with a solid color background that was created using the rectangle tool.

Step 3: To keep the workspace clear, all of the image layers were hidden except for one to start with.
Step 4: After making sure "Sample All Layers" was unchecked, the Magic Wand tool was used to select the empty space around the image, then inverse selected. A new layer was created for this selection and using the Paint Bucket tool, a color was dumped into the selection on its new layer. Then the original image layer was deleted.
Step 5: Step 4 was repeated for the rest of the images.

Key Objectives and Photoshop Features
1. Manage layer groups
2. Manage layer visibility
3. Magic Wand tool
4. Quick Selection tool
5. Manipulate the brush size to make a precise selection
6. Apply the Object Select tool for selection
7. Apply the Pen Tool to create a path
8. Use the Paths panel to convert the path to a selection
9. Inverse selection
10. Paint Bucket tool
11. Add color swatches based on color codes (hex, RGB formulas)
12. Delete background
13. Add layers
14. Delete layers
15. Save in appropriate file format and using file naming structure
15. Submit files to Canvas
Copyright Statement:
The background image and the four subject images were provided by the instructor.

